Image Navigation and Annotation Tools
Clinical Viewer provides many functions and options to inspect and document a slide image. This page walks through how to zoom and pan on images as well as create or manage Regions of Interest (ROIs).
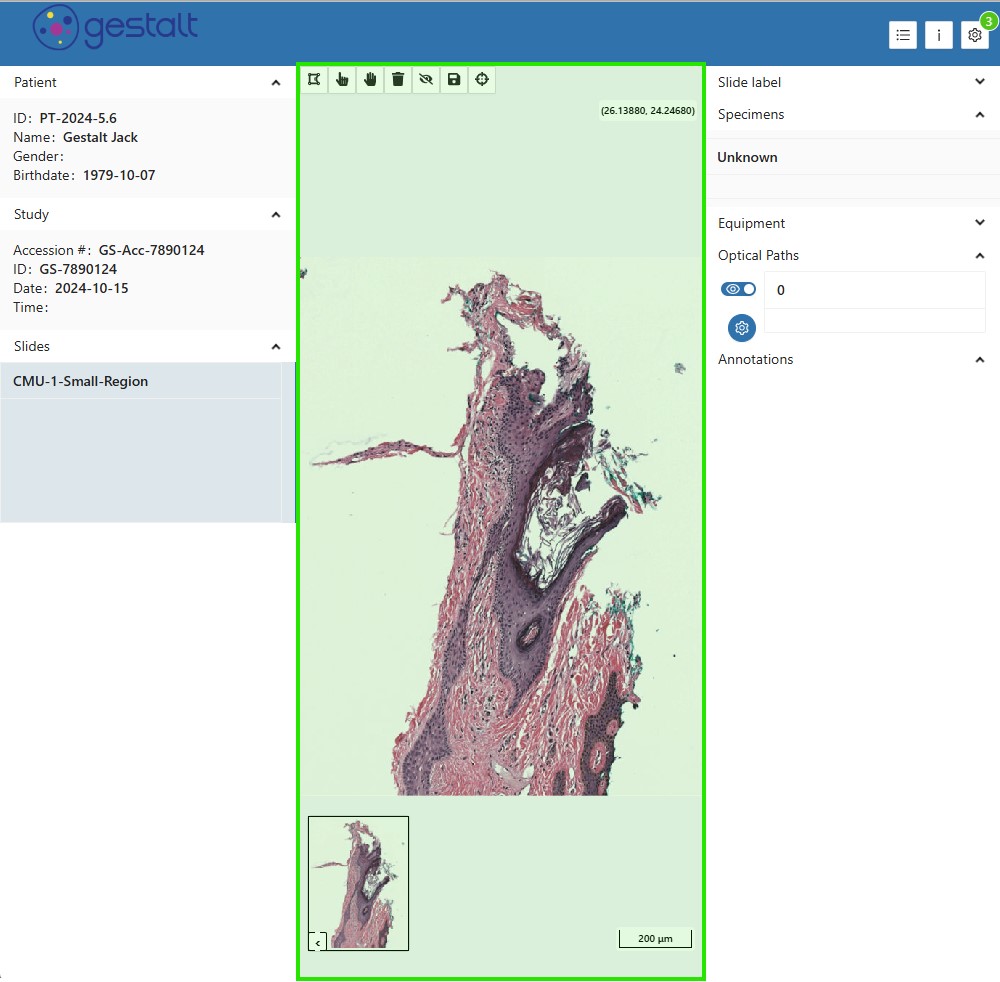
Please make sure you have read and understood the Clinical Viewer page before reading this tutorial, as it assumes some knowledge on the location of the Case Information, WSI Viewer, and Image Information panes.
Image Navigation
Steps:-
Move your cursor over the WSI Viewer pane and scroll up/down to zoom in/out. Make sure your cursor is within the highlighted area as shown below in order to work properly.
-
Click and drag within the WSI Viewer to pan around the image.
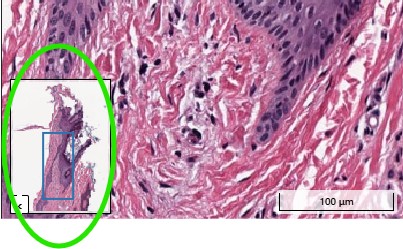
You can also pan around the image by clicking and dragging the Point of View box within the preview window of the WSI do the desired location.
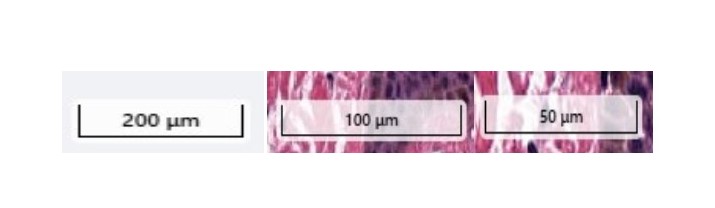
- Continue examining the image as needed. Take note that the WSI scale on the bottom right side of the image will dynamically change to maintain accuracy with any level of zoom.
Annotation Tools
Clinical Viewer supports many tools for annotating an image and the next sections will detail how to use all of the important features. Please see the below image for reference when learning how to use the annotation tools:
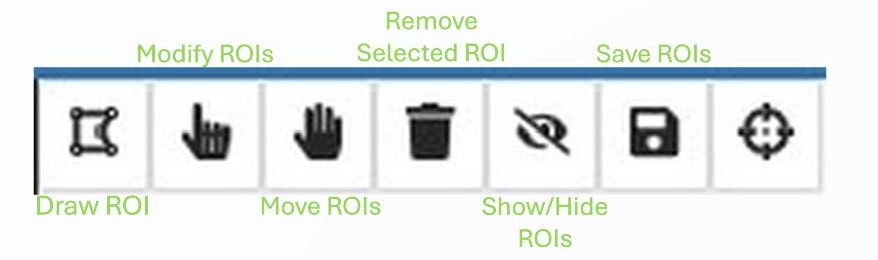
Draw ROI
The Clinical Viewer tool provides many different options and ways to annotate an image, allowing template shapes as well as freehand drawing of ROIs. For the purposes of this tutorial, we will stick to only using template shapes as an example.
Steps:-
Click the "Draw ROI" tool from the top left of the Annotation Tools task bar.
-
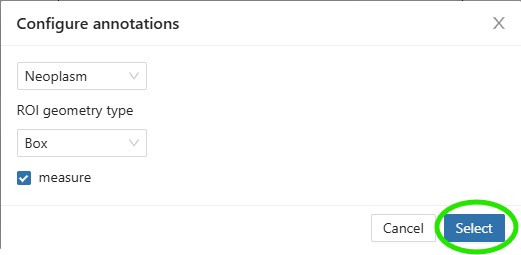
Choose an Annotation Class of either Neoplasm or Tissue. In this example, we will use Neoplasm.
-
Choose an Annotation Type. In this example we chose Box.
-
Check the "Measure" box to enable ROI measuring.
-
Click the "Select" button to return to the WSI Viewer with the draw tool active.
-
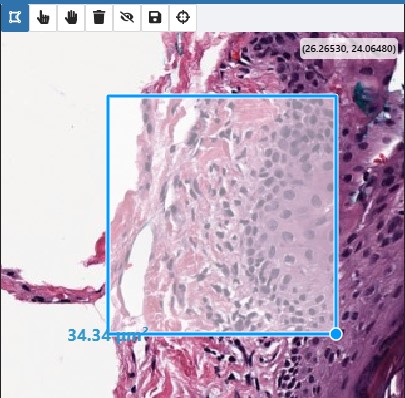
Click once and move the cursor to grow or shrink the ROI as needed, then click again to lock it at the desired size.
-
Click the "Draw ROI" tool to deactivate it and return back to the default cursor mode.
Modify ROI
Steps:-
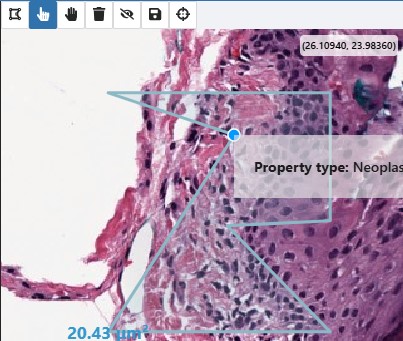
Click the "Modify ROIs" tool from the Annotation Tools task bar.
-
Hover over the ROI that you wish to change.
-
Click and drag the edge of an ROI to change its size/shape.
-
Release the cursor once you change the ROI to the desired size/shape.
-
Click the "Modify ROIs" tool to deactivate it and return back to the default cursor mode.
Move ROI
Steps:-
Click the "Move ROIs" tool from the Annotation Tools task bar.
-
Hover over the ROI that you wish to move.
-
Click and drag the ROI and move it to the desired location.
-
Release the cursor once you finish moving the ROI.
-
Click the "Move ROIs" tool to deactivate it and return back to the default cursor mode.
Delete ROI
Steps:-
Click the ROI you wish you remove from the "Image Information" pane on the right side. The selected ROI will change color from the others. In this example, we have the rectangle "ROI 2" highlighted for deletion.
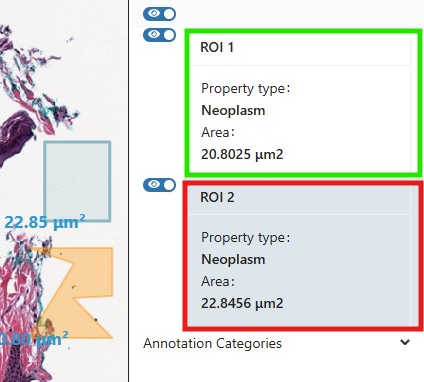
-
Click the "Remove Selected ROI" tool from the Annotation Tools task bar to remove the ROI.
Clicking the "Remove Selected ROI" tool without first selecting a specific image will delete all ROIs present on the image.
Show/Hide All ROIs
Click the "Show/Hide ROIs" button from the Annotation Tools task bar to show/hide all ROIs in the WSI viewer.
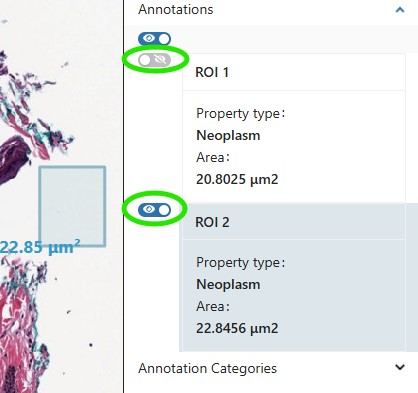
Show/Hide Individual ROI
Click the visibility switch corresponding to the desired ROI on the "Image Information" pane to show/hide a single ROI in the WSI viewer.
Save ROIs
Steps:-
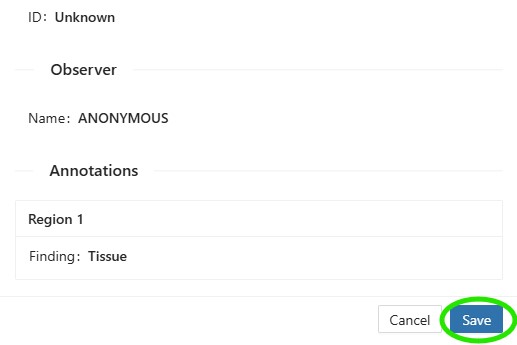
Click the "Save ROIs" tool from the Annotation Tools task bar.
-
Click the "Save" button at the bottom of the window once you have verified the report to save the annotations.